There is a certain kind of joy that comes from making something truly tasty with very little effort. It is a sweet delight, a simple pleasure that does not ask for much from your time or your pantry. Sometimes, the most wonderful treats are the ones that come together with surprising speed, offering a moment of pure, unadulterated happiness without a long list of ingredients or a complicated process. This particular kind of sweet creation fits that description perfectly, bringing a smile to faces young and old with its straightforward approach to deliciousness.
For anyone who enjoys a comforting, chewy snack, yet perhaps prefers to avoid the usual sticky addition, this recipe offers a delightful alternative. It brings together a few basic items to create a familiar favorite, but with a different sort of melt-in-your-mouth quality. You see, this version of a classic crispy treat relies on a different kind of sweet binder, one that provides a rich creaminess and a tender chew, rather than the stretchiness you might expect. It is a simple swap that makes a big difference in the final product, resulting in a treat that is, you know, quite distinct.
Get ready to discover how just a handful of items can transform into something truly special. This approach means you can have a batch of these comforting squares ready in practically no time at all. It is a fantastic option for a quick dessert, a school snack, or just a little something sweet to brighten your day. We will walk through how to make these delightful, easy-to-prepare goodies, showing you how simple it truly is to whip up a batch of these soft, chewy squares without any fuss or bother, and it's almost a little too easy.
Table of Contents
- What Makes These 3 Ingredient Condensed Milk Rice Krispies Special?
- Why Skip the Marshmallows in Your 3 Ingredient Condensed Milk Rice Krispies?
- Gathering Your Simple Supplies
- The Few Things You Need for 3 Ingredient Condensed Milk Rice Krispies
- How Do You Put Together These 3 Ingredient Condensed Milk Rice Krispies?
- What Steps Create Perfect 3 Ingredient Condensed Milk Rice Krispies?
- Achieving the Ideal Texture
- Tips for Handling Your 3 Ingredient Condensed Milk Rice Krispies
What Makes These 3 Ingredient Condensed Milk Rice Krispies Special?
These particular sweet treats stand apart from their more common cousins in a couple of key ways. First, as the name suggests, they call for only a very small collection of items to bring them to life. This means less time spent searching through cupboards and more time enjoying the outcome. Second, and perhaps most importantly for some, they achieve their delightful chewiness without the traditional gooey binder often found in similar snacks. This makes them a unique choice for those who might have specific preferences or just want a different kind of mouthfeel. They offer a comforting, familiar taste, yet with a distinct character that sets them apart, basically, from the usual fare.
Why Skip the Marshmallows in Your 3 Ingredient Condensed Milk Rice Krispies?
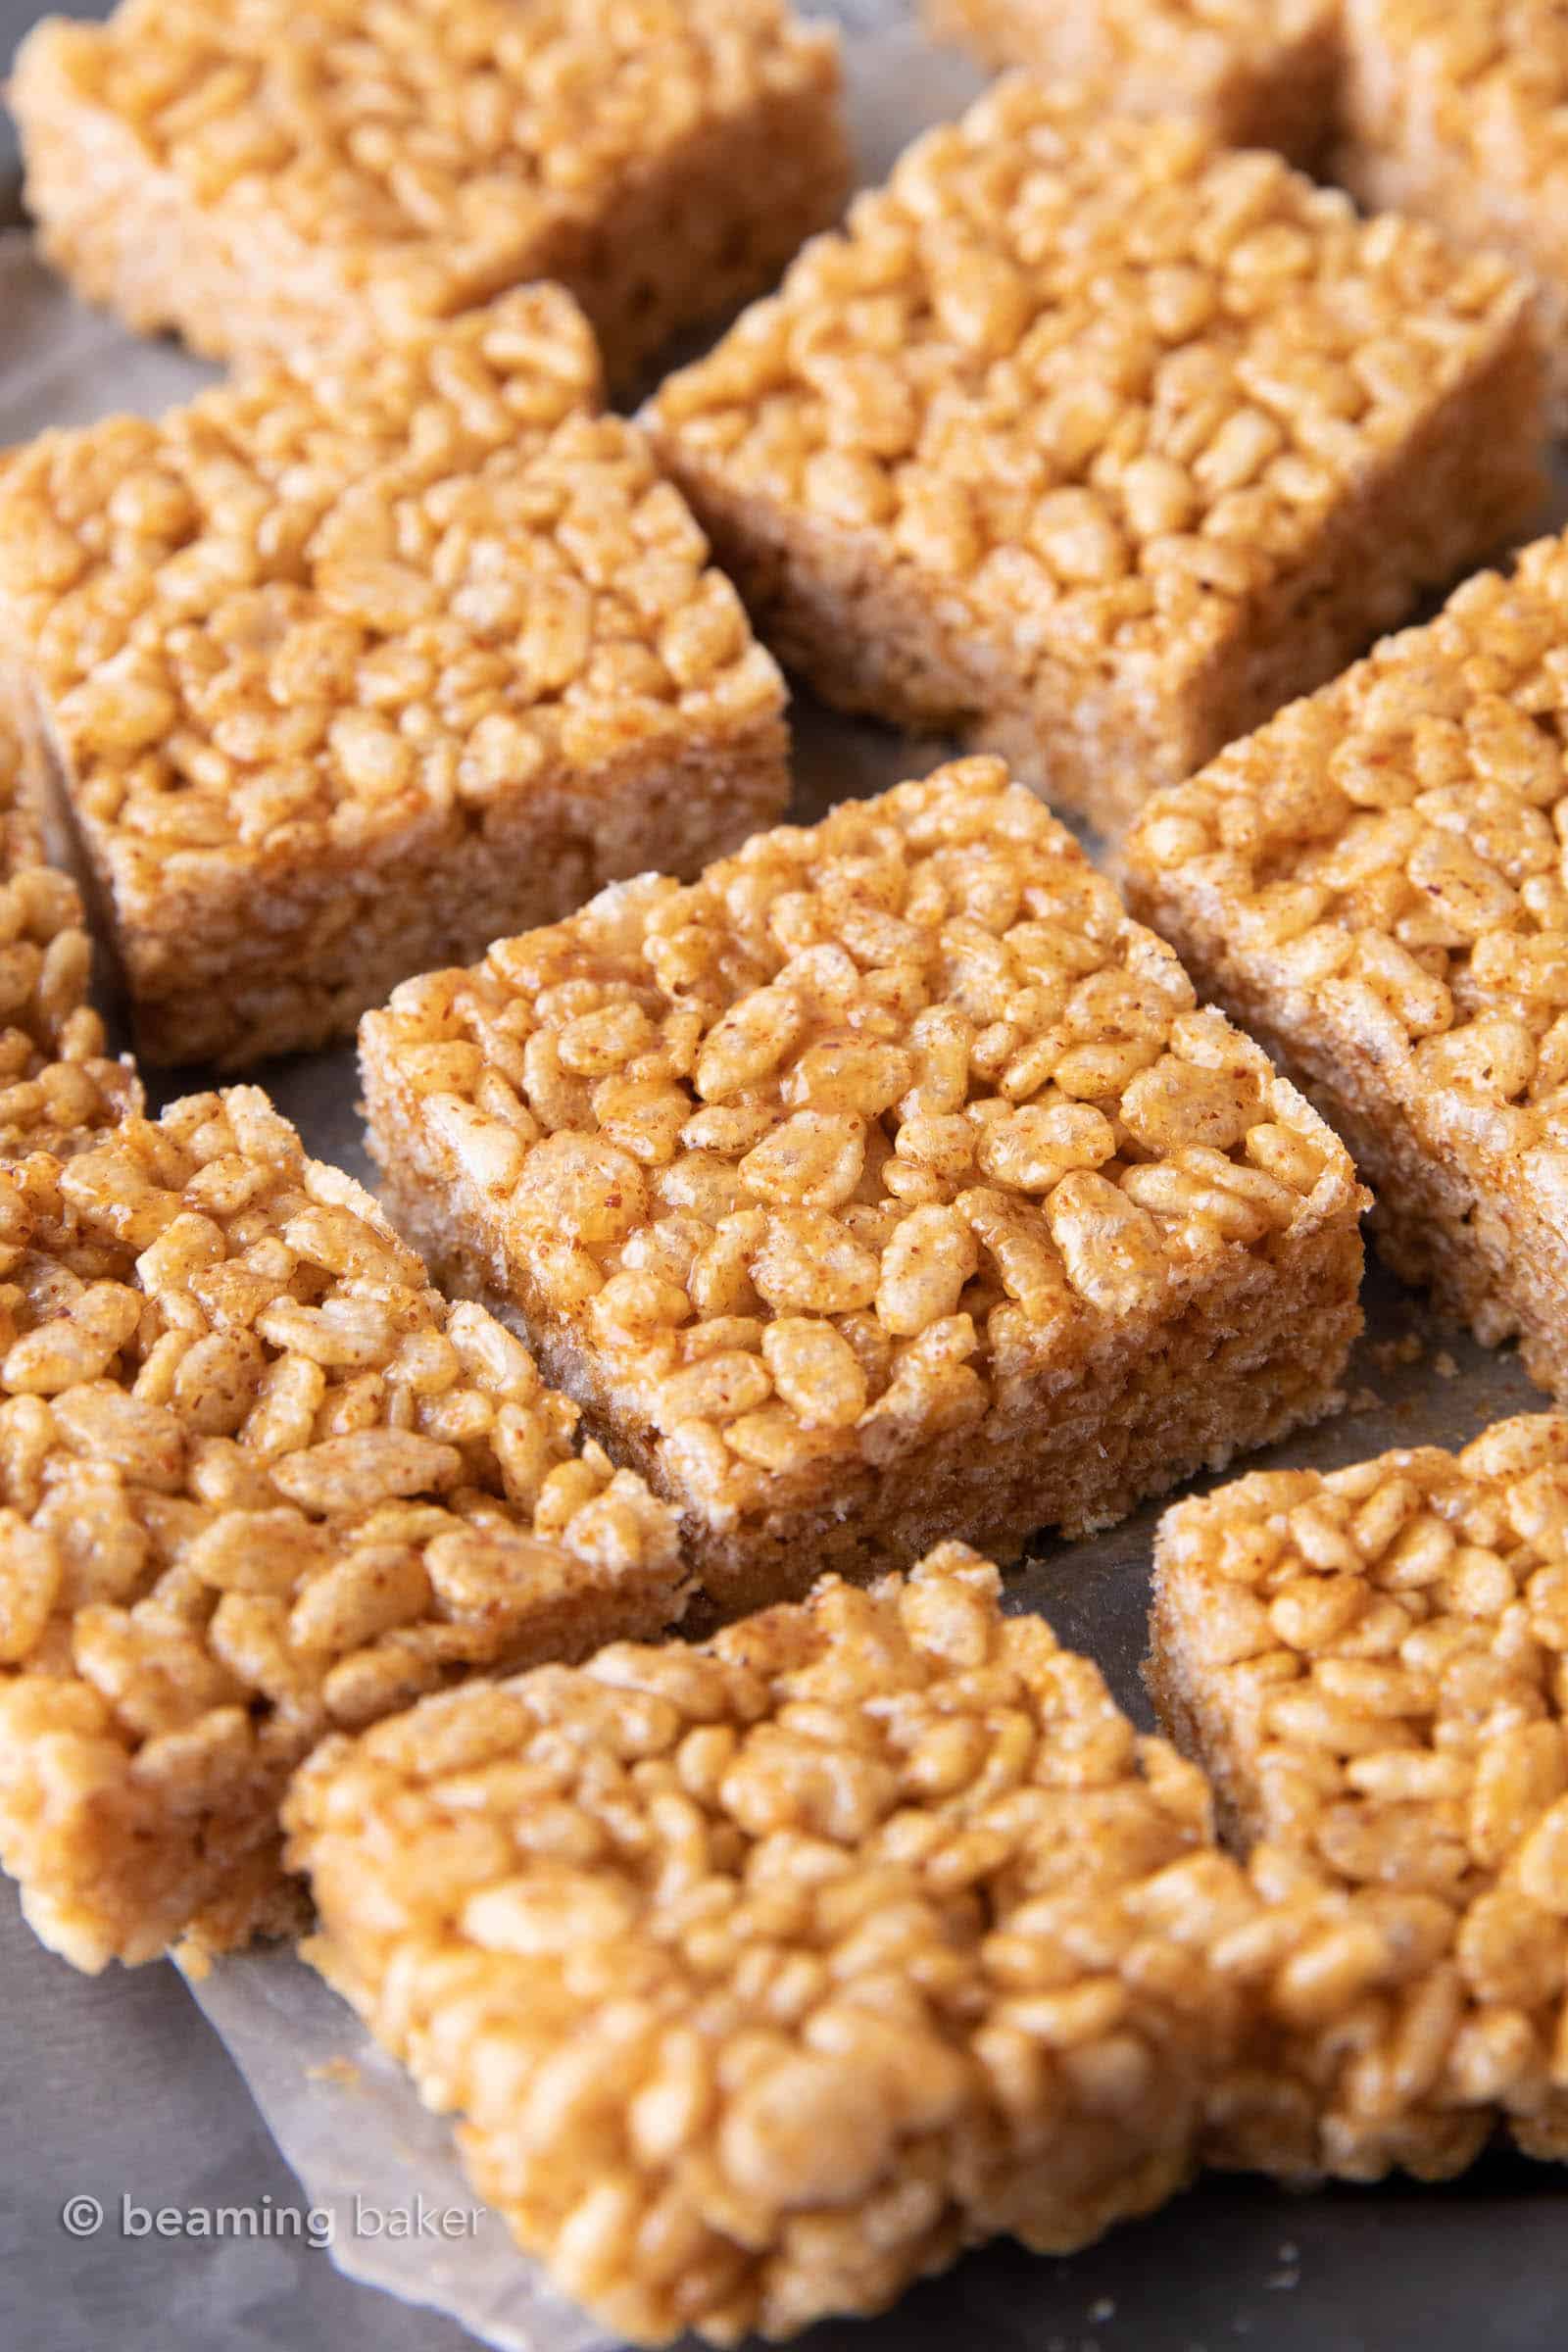
Many people wonder why someone might choose to leave out the typical fluffy white puffs from their crispy cereal squares. Well, there are a few good reasons. For one thing, using sweetened condensed milk instead creates a different kind of soft texture, one that is more creamy and less stringy or stretchy. It provides a rich sweetness that coats each cereal piece beautifully, resulting in a treat that is, in a way, more uniformly tender. This choice can also be helpful for those with certain dietary needs or simply for anyone looking for a simple change of pace. It offers a fresh perspective on a beloved snack, so you know, it's worth trying.
The absence of the usual sugary puffs also means a slightly different flavor profile. Sweetened condensed milk brings a milky, caramelized sweetness that is quite lovely on its own. It allows the simple, wholesome taste of the puffed rice cereal to come through, complemented by a smooth, rich base. This method makes for a treat that feels a little more substantial and, you know, a bit more decadent, without being overly heavy. It is a clever way to achieve a delightful chew without relying on the typical ingredient, offering a pleasant surprise for your taste buds.
Furthermore, the preparation process itself becomes even more straightforward when you opt for this approach. There is no need to carefully melt and stir the fluffy bits, which can sometimes be a bit of a sticky situation. Instead, you work with a liquid sweetener that blends in smoothly and easily. This simplicity is a big part of the appeal for these 3 ingredient condensed milk rice krispies. It means less fuss and a quicker path to enjoying your homemade snack, truly making it a convenient choice for busy moments.
Gathering Your Simple Supplies
Before you begin the process of making these wonderful treats, it is a good idea to have everything you need laid out and ready to go. This makes the whole experience much smoother and more enjoyable. You will not need a lot of specialized kitchen tools or a long shopping list for this particular recipe. The beauty of it lies in its very basic requirements, which means you can often whip these up spontaneously without a trip to the store. Just a few everyday items will do the trick, and it's almost too simple.
The Few Things You Need for 3 Ingredient Condensed Milk Rice Krispies
As the name implies, you will only require a trio of items to create these satisfying squares. The first is, of course, the puffed rice cereal. This forms the crispy base of your treat, providing that signature crunch. You will want a good amount of this, enough to fill a large mixing container. The second essential item is sweetened condensed milk. This is the star of the show, providing the sweetness and the binding power that holds everything together. It is what gives these particular treats their distinct soft chew and rich flavor. And finally, you will need a small amount of a fat, typically butter, to help with the melting process and to add a little richness to the mixture. That is literally all you need to get started, so, pretty straightforward.
To begin, you will want to measure out your puffed rice cereal into a sizeable bowl, one that gives you plenty of room to stir comfortably. A large heatproof bowl is a good choice for this, as it will hold the cereal and later accommodate the warm liquid. Next, you will prepare your butter. Take your butter and cut it into smaller pieces. This helps it melt more evenly and quickly when you warm it. Place these smaller pieces of butter into a medium-sized saucepan. This pan will be where you combine the butter with the sweetened condensed milk, creating the warm, sticky binder for your cereal. It's important to have these items ready before you start heating anything, just to keep things moving along nicely.
Having these three main items prepared and within easy reach makes the next steps a breeze. The simplicity of the ingredient list means less measuring and less fuss, allowing you to focus on the brief cooking process and the fun of combining everything. It is a straightforward approach that yields a delightful result, making these 3 ingredient condensed milk rice krispies a truly approachable recipe for anyone looking for a quick and satisfying sweet snack. You know, it really is that simple.
How Do You Put Together These 3 Ingredient Condensed Milk Rice Krispies?
Making these treats is a wonderfully simple process that does not require any special cooking skills. It is mostly about gentle heating and thorough mixing. The steps are quite logical and follow a natural progression from preparing the binder to combining it with the cereal. You will find that the whole procedure moves along quite quickly, meaning you will be enjoying your homemade squares in no time. It is a satisfying little project that delivers big on taste with minimal effort, and you know, that's pretty good.
What Steps Create Perfect 3 Ingredient Condensed Milk Rice Krispies?
The first step involves preparing the binding mixture. Take the saucepan with the small pieces of butter you prepared earlier and place it over a gentle heat on your stovetop. You want the butter to melt slowly and completely. Once the butter has turned into a liquid, it is time to add the sweetened condensed milk to the same saucepan. Pour the entire contents of the can into the melted butter. Keep the heat low to medium, as you do not want the mixture to boil vigorously or scorch. You are simply warming it through and allowing the butter and condensed milk to become fully combined and smooth. Stir this mixture gently and continuously for a few minutes until it is well blended and warm. This warm, fluid mixture is what will hold your cereal together, so, you know, get it just right.
Once your butter and sweetened condensed milk mixture is warm and smooth, carefully remove the saucepan from the heat. Now, it is time to bring everything together. Pour this warm, sweet liquid directly over the puffed rice cereal that you have waiting in the large heatproof bowl. This is where the magic really starts to happen. Using a sturdy spoon or a rubber spatula, begin to gently fold and stir the cereal into the liquid. The goal is to coat every single piece of cereal evenly with the warm, sticky mixture. Take your time with this step, making sure there are no dry pockets of cereal left at the bottom of the bowl. A good, thorough mix ensures that each bite of your finished treat will be equally delicious and held together properly, and it's almost therapeutic, really.
After all the cereal is well coated, it is time to press the mixture into a prepared pan. You will want a square or rectangular baking pan, perhaps lined with parchment paper or lightly greased to prevent sticking. This makes it much easier to remove the finished treats later. Spoon the coated cereal mixture into your chosen pan. Then, using the back of your spoon, a piece of wax paper, or even your clean hands (lightly buttered if you wish to prevent sticking), press the mixture down firmly and evenly into the pan. You want to create a compact layer that is consistent in thickness across the entire pan. This firm pressing helps the treats hold their shape once they are cool. This step is important for creating neat, uniform squares, so, you know, give it a good press.
Finally, once the mixture is pressed into the pan, it needs time to set. Place the pan in a cool spot, perhaps on your counter if it is not too warm, or even in the refrigerator for a shorter period. Allowing the treats to cool completely is crucial. As they cool, the sweetened condensed milk mixture will firm up, binding the cereal pieces together into solid, cuttable squares. This cooling process typically takes about an hour or so, depending on the temperature of your room. Once they are fully cooled and firm, you can then slice them into individual portions. This simple series of actions leads to a delightful outcome, giving you a batch of soft, chewy 3 ingredient condensed milk rice krispies ready to enjoy, basically, whenever you want.
Achieving the Ideal Texture
The texture of these particular crispy treats is one of their most appealing qualities. Unlike versions made with the more common fluffy binder, these have a distinct softness and a pleasant chewiness that is quite satisfying. They are not overly sticky or hard; instead, they offer a tender bite that melts in your mouth. Getting this just right depends on a few simple considerations during the preparation process. It is about understanding how the sweetened condensed milk works its magic to create that lovely consistency, so, you know, pay attention to the details.
Tips for Handling Your 3 Ingredient Condensed Milk Rice Krispies
To ensure your 3 ingredient condensed milk rice krispies turn out perfectly soft and chewy, there are a couple of small things to keep in mind. When you are warming the butter and condensed milk, make sure the heat is not too high. A gentle, steady warmth is what you are aiming for, just enough to combine the ingredients and make them fluid. Overheating can cause the mixture to become too thick or even burn, which would affect the final texture and taste. A low to medium heat setting is usually ideal for this step, and it's almost foolproof if you watch it.
Another helpful hint involves the mixing process. Once you pour the warm liquid over the cereal, work quickly but thoroughly. You want to coat all the cereal pieces before the mixture starts to cool and thicken too much. If the binder cools down too much before it is fully mixed in, it can become difficult to spread evenly, leading to some parts being dry and others overly dense. A good, swift stir ensures a consistent texture throughout your batch. This helps to make sure every square is equally delightful, so, you know, be quick about it.
When it comes to pressing the mixture into the pan, apply firm, even pressure. This is what gives your treats their structure and helps them hold together once cut. If you press too lightly, the squares might crumble apart. If you press unevenly, some parts might be denser than others. A consistent press from edge to edge ensures that each piece is uniform and has that satisfying chew. You can use a piece of parchment paper on top of the mixture before pressing to prevent sticking to your hands or tools, which is actually quite helpful.
Finally, patience during the cooling period is a virtue. It might be tempting to cut into your 3 ingredient condensed milk rice krispies as soon as they are pressed, but giving them ample time to cool and set completely is important. This allows the condensed milk to firm up properly, resulting in clean cuts and a stable, chewy treat. Rushing this step can lead to messy, crumbly squares. Letting them rest until they are fully firm ensures that you get those lovely, soft, and perfectly formed pieces that are a joy to eat. This little wait is worth it for the best possible outcome, so, you know, try to wait it out.